What Is DTF Printing? Direct to Film Transfers Explained
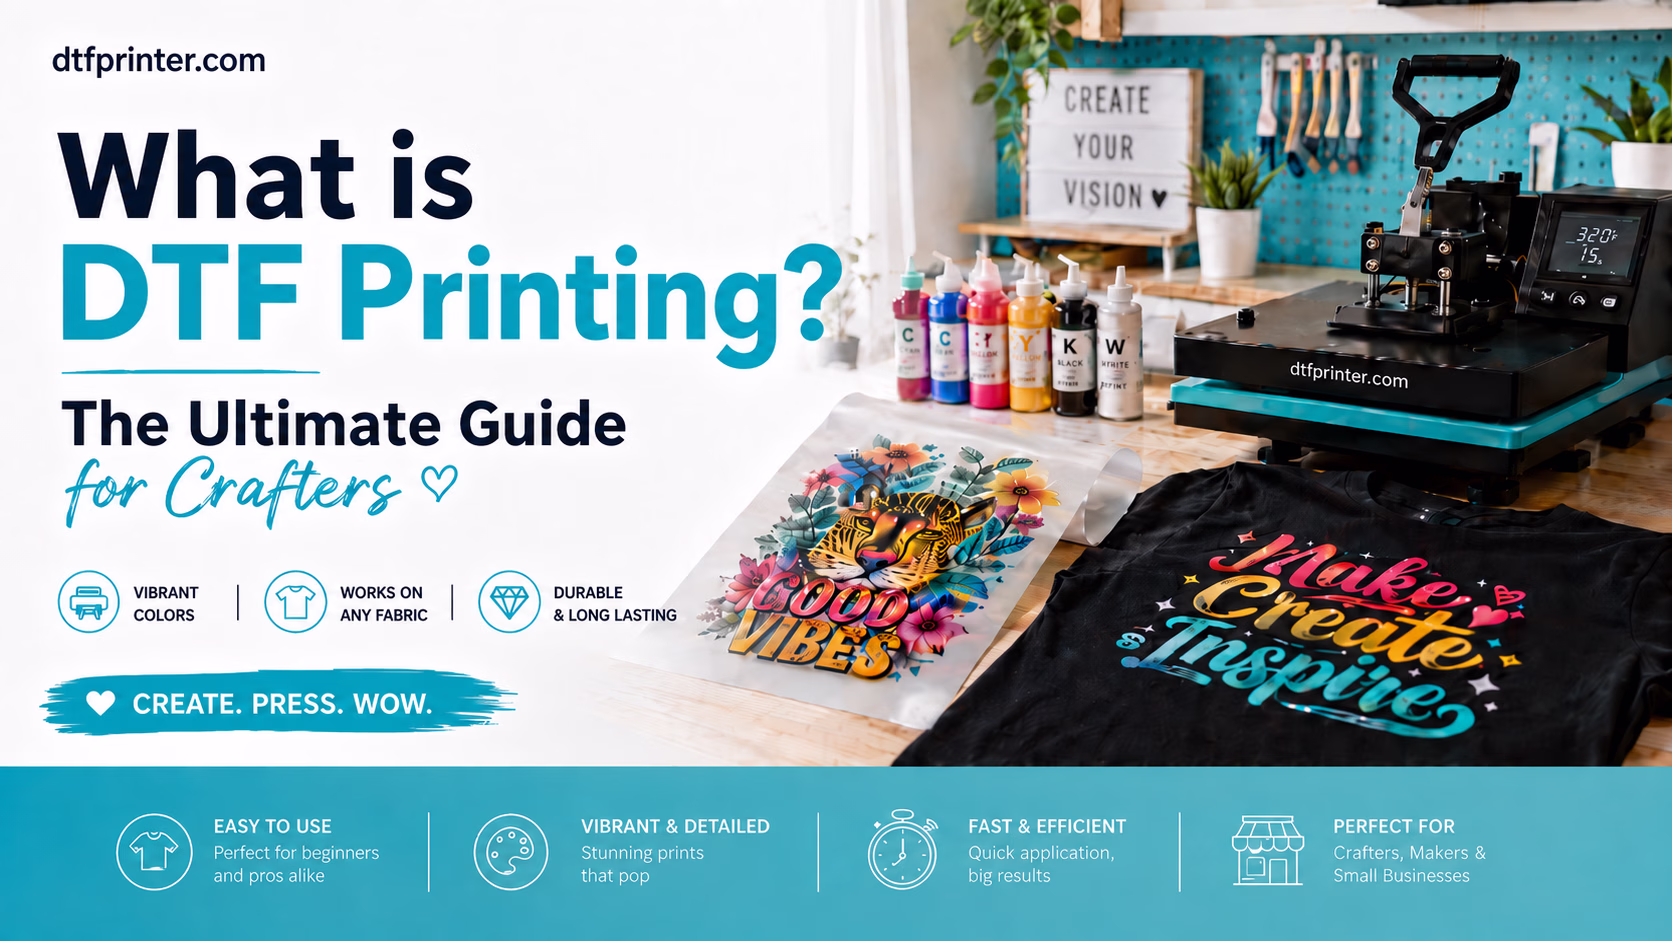
DTF at a glance
- Stands for: Direct to Film
- Works on: cotton, polyester, blends, nylon, canvas, denim, light or dark
- Applied with: a heat press, or a household iron in a pinch
- Press settings (typical): about 300-320°F / 150-160°C for 10-15 seconds, medium-firm pressure (see how to apply DTF transfers for exact cotton vs polyester figures)
- Durability: 50+ washes without cracking or fading when applied correctly
- No minimums, no weeding, no screens: order a single transfer or a full gang sheet
Watch: DTF 101, a beginner's guide to direct to film printing
What does DTF stand for, and what does DTF mean in printing?
DTF stands for Direct to Film. In printing, DTF means the design is printed directly onto a film, rather than onto the garment (like DTG) or onto paper that dyes the fabric (like sublimation). The film carries a finished, full color design plus a white underbase, ready to press whenever you need it.
Note: DTF is also an internet slang term unrelated to printing. This guide is strictly about DTF as a printing and transfer method.
How does DTF printing work?
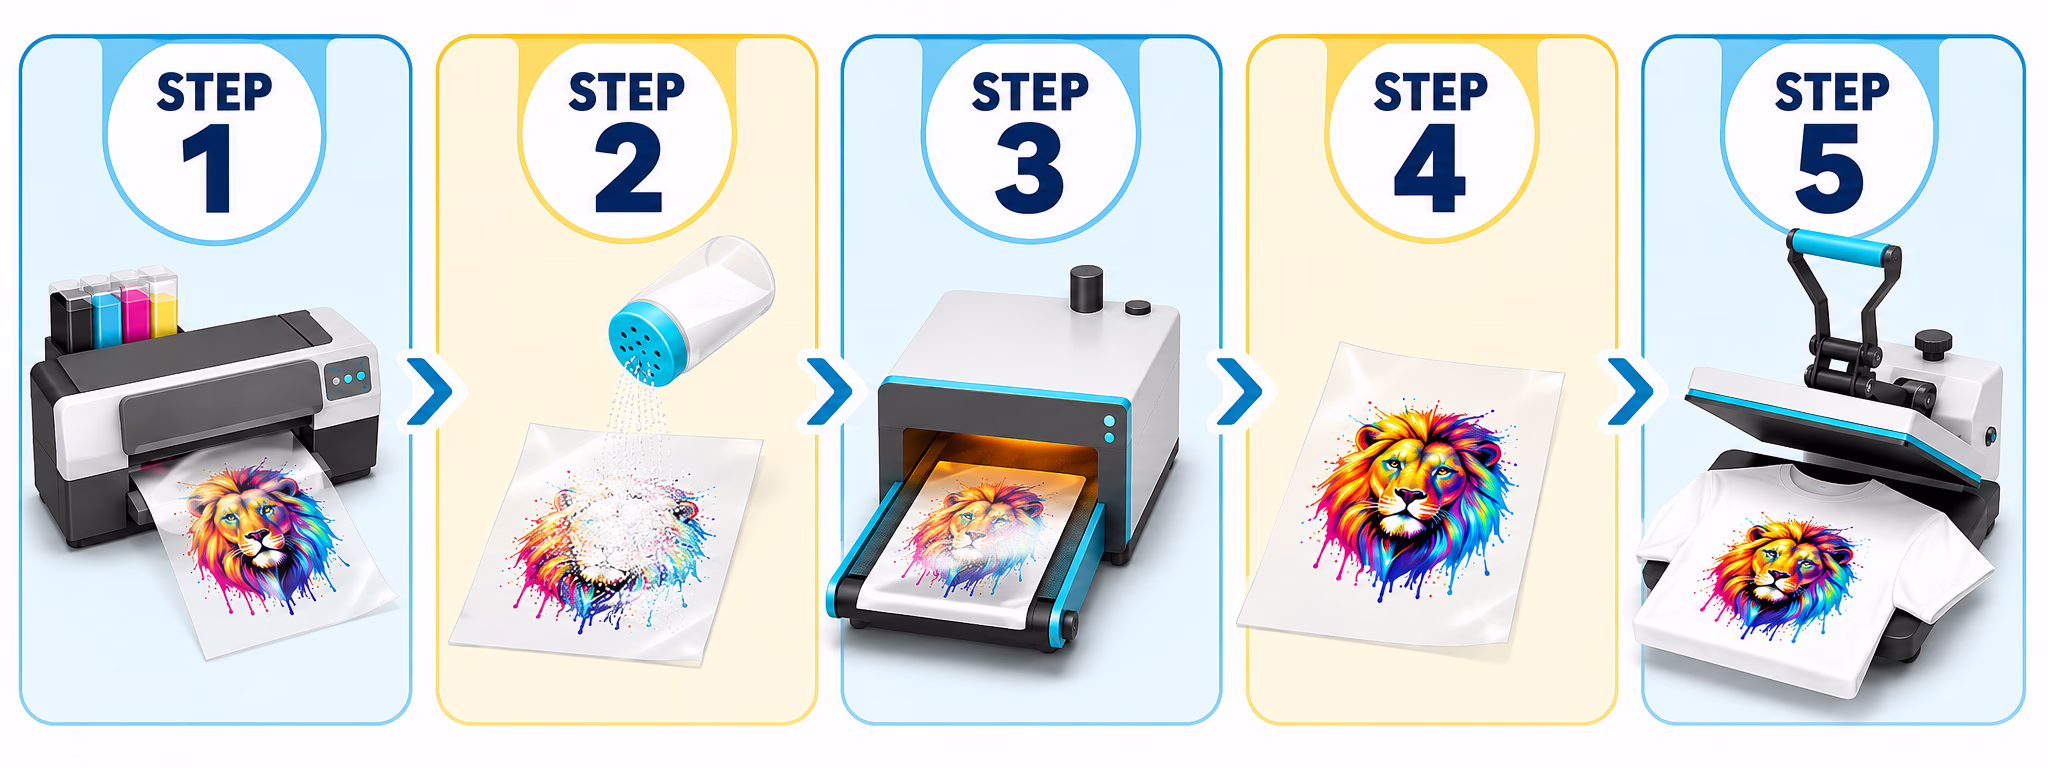
DTF is a five-step process that produces a press-ready transfer.
1. Print the design on film
The artwork is printed in CMYK plus a white underbase onto a coated PET film. The white layer is what keeps colors vivid on dark garments.
2. Apply adhesive powder
A hot-melt adhesive powder is applied to the wet ink so it sticks only where the design is.
3. Cure the powder
The transfer passes through a curing oven that melts and bonds the powder to the ink, creating a press-ready film.
4. Ship or store
The finished transfer is trimmed and ready to use. It stores for months, so you can press it whenever you need it.
5. Heat press onto your item
You heat press the transfer onto your garment, peel the clear film, then re-press to lock it in.
The white underbase is the key step. It is why DTF designs stay vivid on black and colored garments, where sublimation cannot go.

What is a DTF transfer, and what is a DTF printer?
A DTF transfer is the finished, press-ready film for fabric items such as shirts, hoodies, bags and hats. You do not need to own any equipment to use one: you just press it on.
A DTF printer is the industrial machine that makes those transfers. If you buy ready-to-press transfers, the printer side is already handled for you, so all you need is a heat press.
How are DTF transfers made, and can you make them at home?
Can you make DTF transfers at home? Technically yes, but it is rarely worth it for most crafters. A DTF printer, adhesive powder, a curing setup and the regular maintenance to stop the white ink clogging add up to real cost and a learning curve. That is why most people buy ready-to-press transfers and only need a heat press to apply them: full color prints, no equipment, no powder mess, and no minimum order.
Wondering whether the regular inkjet printer you already own can do the job? We answer that in can you use an inkjet printer for DTF.
DTF vs UV DTF
UV DTF is a related but different product for hard surfaces such as cups, tumblers, glass, wood and metal. You peel and stick it (no heat needed), and it is not made for machine-washable apparel.

| DTF | UV DTF | |
|---|---|---|
| Best for | Fabric and apparel | Hard surfaces (cups, glass, wood) |
| Applied with | Heat press or iron | Peel and stick, no heat |
| Survives the wash | Yes, 50+ washes | Not for machine-wash apparel |
| Finish | Soft, flexible on fabric | Durable, glossy on hard goods |
DTF vs sublimation, DTG and screen printing
| Method | Works on | Color limits | Best when |
|---|---|---|---|
| DTF | Almost any fabric, any color including dark cotton | None (full color, photos) | Custom and small-batch work on mixed fabrics |
| Sublimation | Light polyester only | None, but no white ink | All-over polyester prints with zero hand-feel |
| DTG | Mostly cotton | Full color | One-off cotton tees, ink printed into the garment |
| Screen print | Most fabrics | Limited per screen | Thousands of the same one or two-color design |
For most custom and small-batch work, DTF is the most versatile option. Compare them in detail in DTF vs sublimation vs vinyl (HTV).
Advantages and limitations of DTF
Advantages
- Any fabric, any color, including dark cotton, thanks to the white layer.
- Full color and fine detail: gradients, photos and small text, with no color limits.
- No weeding, no screens, no minimums, so far less labor than vinyl or screen printing.
- Durable and stretchy: it flexes with the fabric instead of cracking.
- Fast: order ready-to-press transfers and apply them in seconds.
Limitations
DTF sits on top of the fabric, so it has a slight hand-feel on very large prints, lighter than vinyl and a little heavier than sublimation. For all-over polyester prints with zero hand-feel, sublimation is better. For thousands of one-color shirts, screen printing is cheaper per unit.
How long do DTF transfers last?
Applied correctly, DTF prints withstand 50+ wash cycles without cracking, peeling or fading. Longevity depends on press temperature, time and pressure, and on washing inside-out in cold water and avoiding high-heat drying.
What does DTF cost, and where can you buy transfers?
You do not need to buy a DTF printer to get DTF prints. A DTF printer is an industrial machine (entry hobby units start around several hundred dollars and professional systems run into the thousands), but if you only want finished prints, you buy ready-to-press transfers instead and skip the equipment entirely.
At DTFPrinter.com you can order custom DTF transfers and gang sheets with no minimum order, printed in the USA, with free US shipping over $75. Build a gang sheet to start.
Fabulous Products and Customer Service
The gang sheets are vivid and very high quality. The customer service is fast and personal. Highly recommend using this service for your creative needs. Can't speak highly enough of Wendy and DTFPrinter!
UV DTF Bundle
I ordered the UV DTF Bundle and I love the images! The variety is perfect! The price for the quality and quantity are great!
The colors are so vibrant! I can't wait to design with them🤗
DTF Printer has been amazing to work with
DTF Printer has been amazing to work with! From reviewing my work to getting back high quality transfers in with a very quick turn around. Also, Wendy has responded to my several questions as I figure out how to work with my students to create Graphic T's.
DTF Printer is rated 4.4 out of 5 (Excellent) from 10 reviews on Trustpilot. Read our DTF Printer reviews →
Ready to apply your first one? See how to apply DTF transfers, or price up your order with the price calculator.
